


Fact-checked against Microsoft Learn and VPSLake product information.
Last updated: September 10, 2026
Connecting to a Windows VPS with Remote Desktop Protocol (RDP) gives you a remote Windows workspace that you can control from another computer. You do not need to sit in front of the server: once the connection is working, the VPS desktop, applications and files appear in a normal remote session.
This guide shows how to connect to a Windows VPS from a Windows PC using the built-in Remote Desktop Connection client. It covers standard and custom RDP ports, the details you need before connecting, optional display settings, safe disconnecting and the checks that usually solve a failed login.
What You Need Before Connecting
- A powered-on Windows VPS with Remote Desktop access enabled.
- The VPS public IP address or hostname.
- A Windows username and password allowed to sign in through RDP.
- A network connection from your local device to the VPS.
- The RDP port, normally 3389 unless your provider or administrator supplied a different port.
Keep the VPS credentials private. Do not paste a password into chat, screenshots, support tickets or public documents. If you bought a managed Windows RDP plan, the provider should give you the address and login details through its account or delivery process.
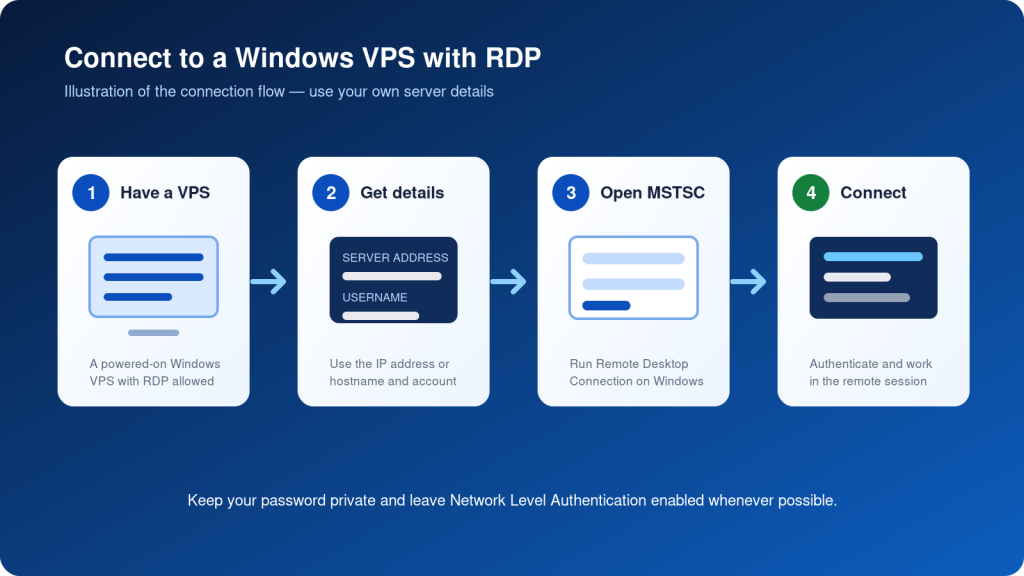
Step 1: Find Your VPS Address and Login Details
Open the email, control panel or service page that contains your VPS delivery information. Identify the server address, username and password. The address may be an IPv4 address such as 203.0.113.25 or a hostname supplied by your provider. The address shown above is an example documentation address, not a real server to use.
If the provider gives you a custom RDP port, note it now. You will enter it after the address in the form SERVER_ADDRESS:PORT. If no custom port is listed, start with the default RDP port and do not change server settings just to follow this guide.
Step 2: Open Remote Desktop Connection
On your local Windows computer, open the Start menu and search for Remote Desktop Connection. You can also press Win + R, type mstsc, and press Enter. The classic client opens with a Computer field for the VPS address.
Enter the address exactly as your provider supplied it. For a standard port, enter only the IP address or hostname. For a custom port, enter the address followed by a colon and the port number, such as 203.0.113.25:3390.
How to Connect to RDP Using a Custom Port
Use these instructions when your provider or server administrator has already configured RDP to listen on a port other than 3389. The custom port must be allowed by both the Windows firewall and any provider-side firewall or security group. Entering a different port in the client does not change the server’s listening port.
Method 1: Enter the custom port in Remote Desktop Connection
- Press Win + R, type
mstsc, and press Enter. - In the Computer field, enter the server address, a colon and the custom port with no spaces.
- Select Connect, then enter the Windows username and password supplied for the VPS.
203.0.113.25:3390Replace the documentation address and port above with your real VPS details. A hostname works in the same format, for example rdp.example.com:3390.
Method 2: Launch the custom-port connection directly
You can open the connection directly from Run, Command Prompt or PowerShell with MSTSC’s /v option:
mstsc /v:203.0.113.25:3390If the connection fails, test the same port from PowerShell:
Test-NetConnection -ComputerName 203.0.113.25 -Port 3390A successful TCP test confirms that the custom port is reachable, but you still need a valid Windows account. If the test fails, confirm the port number, VPS status, RDP listener and firewall rules. To configure the server-side listening port itself, follow our custom RDP port setup guide and keep console or provider-panel access available so a firewall mistake does not lock you out.
Step 3: Configure Optional Connection Settings
Select Show Options if you want to save the username, adjust the display or control which local resources are redirected. These settings are optional; the default connection is usually the best first test.
- Display: Use a smaller resolution or fewer colours if the session feels slow.
- Local Resources: Enable the clipboard only when you need copy and paste. Redirect local drives or printers only when the task requires it.
- Experience: Disable visual effects over a slow connection to reduce bandwidth use.
- General: Save the connection as an
.rdpfile only in a private location, because saved files can contain connection details.
For a first login, avoid redirecting every drive, printer and device. Fewer enabled features make it easier to identify whether the basic RDP connection works.
Step 4: Connect and Sign In
Select Connect. Windows may ask you to confirm the server identity before showing the credential prompt. Review the address and continue only when it matches the VPS you intended to reach.
Enter the supplied username and password. Some providers expect a local account name such as Administrator or SERVER_NAME\username; use the exact format in the delivery instructions. If Windows offers to remember the credentials, leave that option off on a shared computer.
After authentication, the remote Windows desktop appears in a window or full screen. The mouse and keyboard now control the VPS. A short delay during the first login can be normal while Windows creates the user profile and loads the desktop.
How to Disconnect Safely
When you are finished, use Start → your account → Sign out if you want to close the Windows session and end running applications. Choose Disconnect or close the RDP window when you want to leave programs running and reconnect later. Disconnecting does not shut down the VPS.
If the Windows VPS Will Not Connect
Work through these checks in order. They separate an incorrect login from a network or server-side problem.
- Check the address. Compare every character with the provider’s delivery details. If you used a hostname, try the supplied IP address when one is available.
- Confirm the VPS is running. A stopped, suspended or restarting VPS cannot accept an RDP session.
- Check the port. If your provider supplied a custom port, include it after the address. If you are testing the standard port from PowerShell, run the command below with your real address.
- Check the firewall or security group. The server firewall and any provider-side network rule must permit the RDP port from your network.
- Check the account. The username must be allowed to log in through Remote Desktop, and the password must be current. Do not repeatedly guess passwords on a production server.
- Keep Network Level Authentication enabled. Microsoft recommends NLA for most environments. If an older client cannot meet the requirement, update the client or ask the administrator to review the server policy instead of permanently weakening it.
Test-NetConnection -ComputerName YOUR_SERVER_IP -Port 3389Run that command in PowerShell on your local Windows computer. A successful TCP test shows that the port is reachable; it does not prove that the username or password is correct. For a custom port, replace 3389 with the port supplied by your administrator.
Security Recommendations After Your First Login
- Change a temporary or shared password to a long, unique password.
- Install Windows updates and restart when required.
- Keep Network Level Authentication enabled unless you have a documented compatibility reason.
- Limit inbound RDP access with a firewall, VPN or an allowlist of trusted source IP addresses when your environment supports it.
- Use a separate standard account for everyday work and reserve the administrator account for administration.
- Enable only the clipboard, drives, printers and other redirections that you actually need.
- Back up important files independently of the VPS so a reinstall or account problem does not become data loss.
When a Ready-to-Use Windows RDP Is Easier
Connecting to a Windows VPS is simple once the server is provisioned and the network rules are correct. The time-consuming part is often the work around the connection: choosing a Windows image, enabling access, setting a firewall policy, checking licensing and waiting for the server to become usable.
A ready-to-use Windows RDP service can reduce that setup work. VPSLake’s current Windows RDP page lists full administrator access, KVM virtualization, enterprise NVMe storage, instant deployment and multiple listed locations. The page currently shows a 2 GB plan from $7.99 per month, but plan availability, pricing and the selected region can change, so verify the live offer at checkout.
Frequently Asked Questions
Can I connect to a Windows VPS from outside my home network?
Yes. A hosted VPS normally has a public address, so the Remote Desktop client can reach it over the internet when the VPS and provider firewall allow the connection. Avoid exposing RDP broadly when a VPN or source-IP restriction is practical.
Can I use a hostname instead of an IP address?
Yes. Enter the hostname supplied by your provider. If it does not resolve, use the VPS IP address and check the provider’s DNS instructions.
Why does my password work in the provider panel but not in RDP?
The provider-panel password and the Windows account password may be different. Confirm the Windows username, check keyboard layout and Caps Lock, and reset the Windows account password through the provider’s documented recovery process if necessary.
Conclusion
To connect to a Windows VPS using RDP, collect the server address, port and permitted account, open Remote Desktop Connection with mstsc, enter SERVER_ADDRESS or SERVER_ADDRESS:PORT, authenticate and then secure the new session. If the connection fails, check the address, server status, port, firewall and account separately instead of changing several settings at once.
If you prefer to start with a Windows RDP that is already provisioned, get a worry-free Windows RDP from VPSLake and verify the current plan details before ordering.
Sources and Further Reading
- Microsoft Learn: Enable Remote Desktop on your PC
- Microsoft Learn: Change the Remote Desktop listening port
- Microsoft Learn: MSTSC command syntax
- Microsoft Learn: Allow access to your PC from outside your network
- Microsoft Learn: Connect to Remote Desktop Services in Windows Server
- VPSLake: Windows RDP plans and current availability